Sunday 29 July 2018

Birthday Cowgirl

Hello my friends, I am back with another card using the Birdie Brown - Saddle Up & Celebrate stamp set from MFT Stamps.

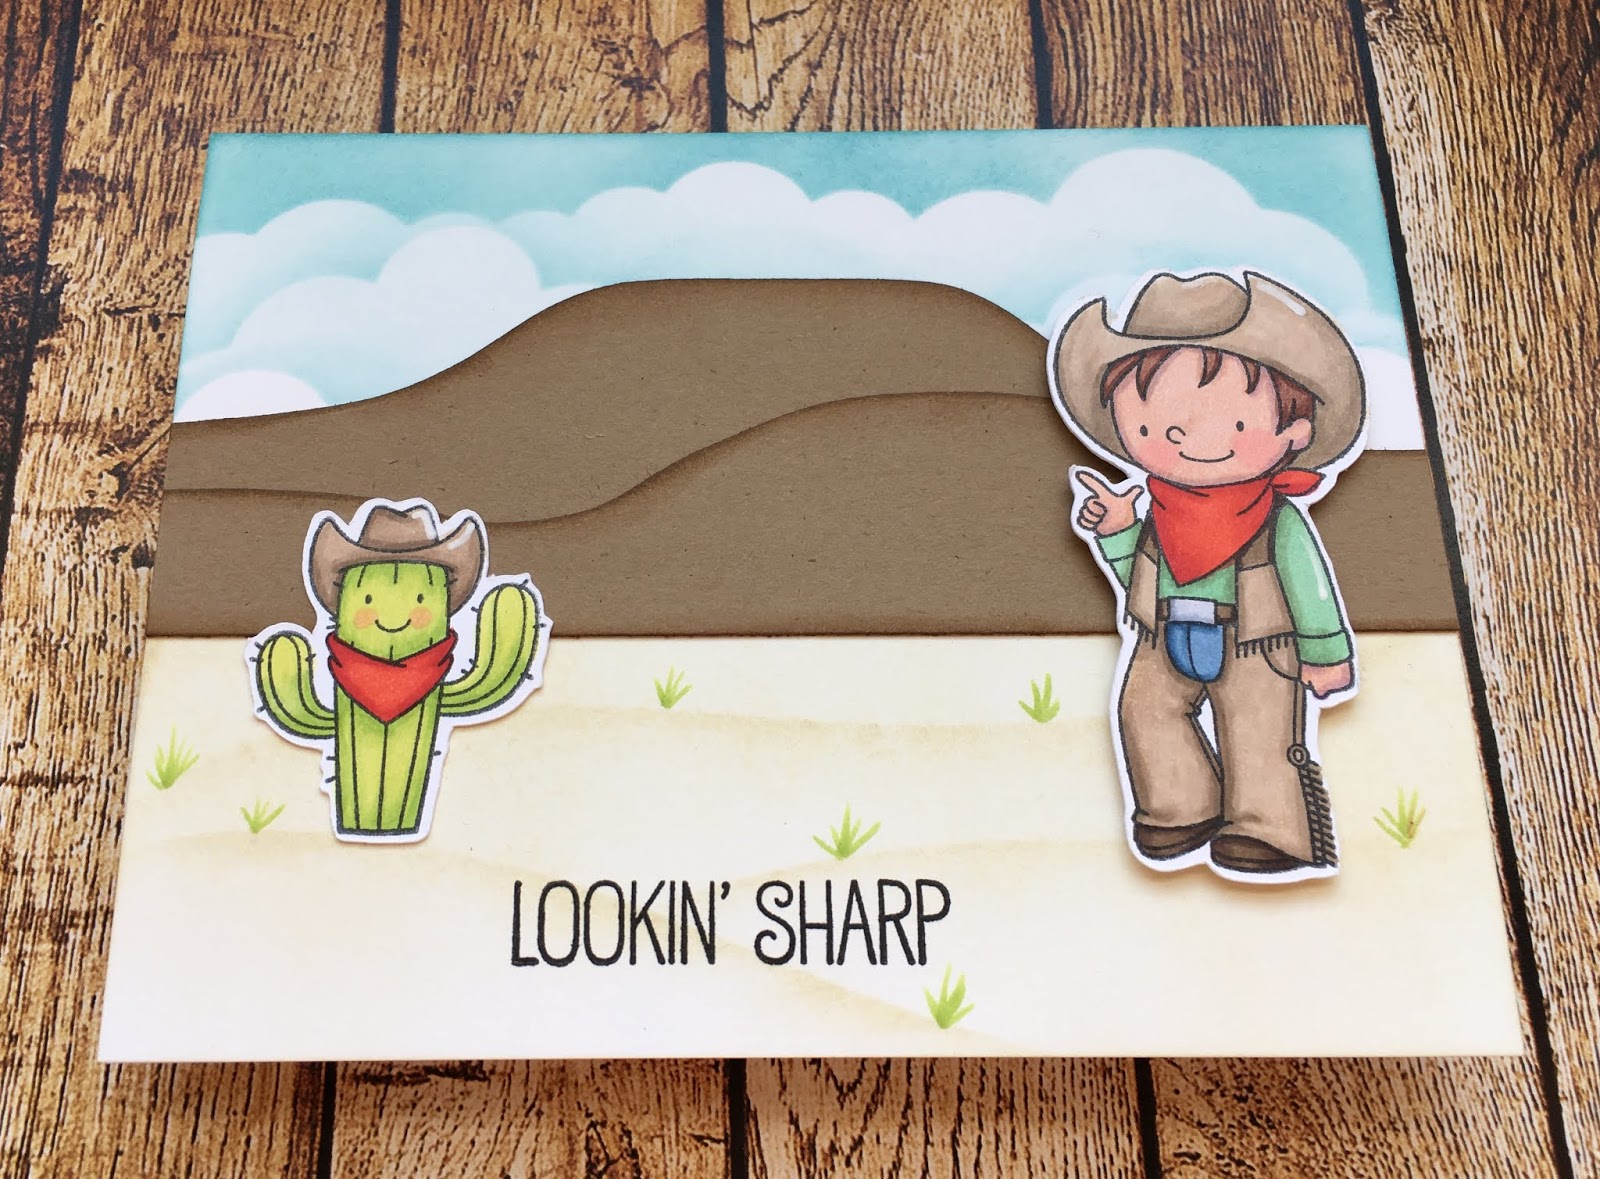
When I coloured up the images, I co-ordinated the cake with the girl's outfit.  I think the cow print cake and ballon are so cute!


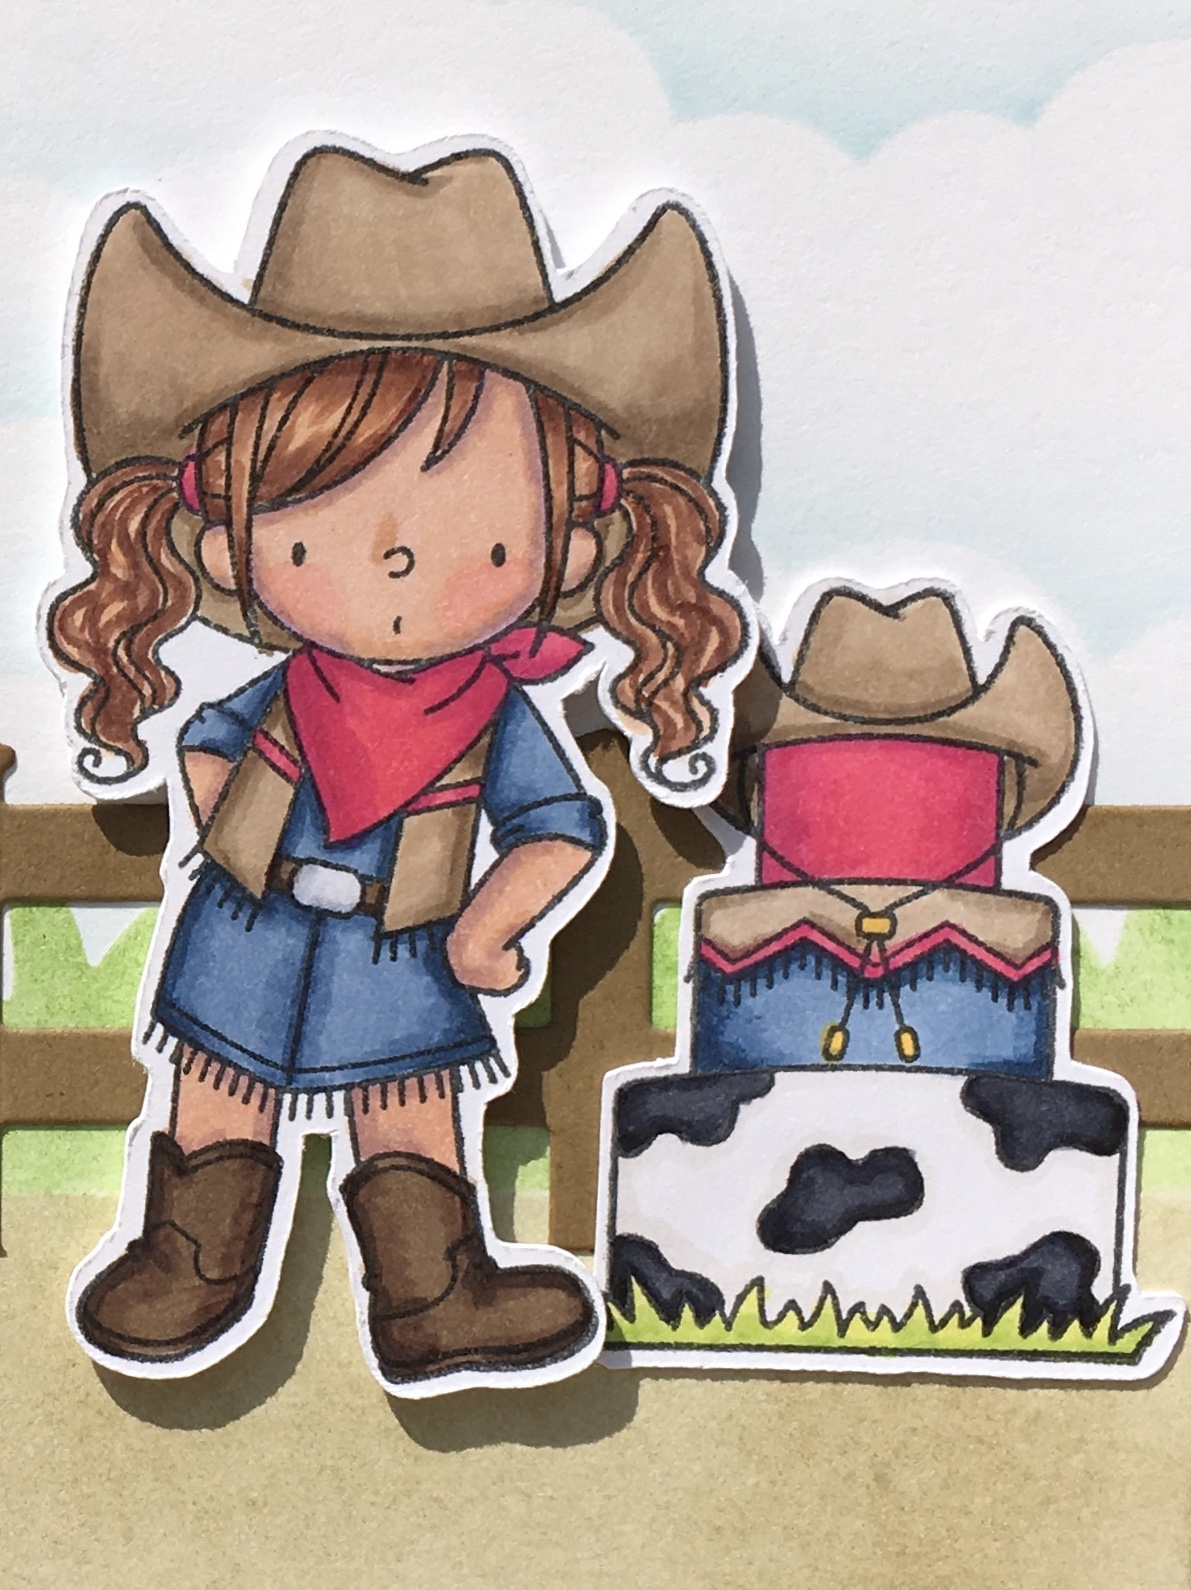
I used the Farm Fence die from MFT Stamps to cut a fence, which I slightly altered by cutting off the lower rung of the fence to make it shorter, so that it would work with my scene a bit better.


I used Distress Inks to create the background and glued all the images flat to the card front except the cowgirl, which I popped up with foam tape.

Below is a list of the supplies I used.

Stamps: MFT Stamps - Birdie Brown-Saddle Up & Celebrate
Dies: MFT Stamps - Farm Fence
Inks: Simon Says Stamp - Intense Black,  Versafine - Onyx Black,  Distress Inks - Broken China, Mowed Lawn and  Frayed Burlap
Copic Markers: Skin - E11, E33, V15, R20  Hair - E21, E25, E27  Hat - E42, E43, E44  Boots & Wagon Wheel - E44, E47, E49  Blue - B93, B97, B99  Pink - RV09, RV14, RV19  Green - YG03, YG21, YG25  Cow Print - E40, C5, C7, C9
Other: Recollections - 110lb White card stock and 65lb Kraft card stock,  Spectrum  Noir - 100lb Ultra Smooth Premium White card stock,  MFT Stamps - Mini Cloud Edges Stencil

Thank you so much for taking the time to drop by.  I hope you have a wonderful day! Kathy

Thursday 26 July 2018

Lookin' Sharp

Hello my friends, today I am finally back to share a card I created using the Birdie Brown - Saddle Up & Celebrate stamp set from MFT Stamps.

I created the background using a couple of stencils and dies from MFT Stamps and Distress Inks.  The stamped images were coloured with Copic markers.


Below is a list of the supplies I used.

Stamps: MFT Stamps - Birdie Brown-Saddle Up & Celebrate
Dies: MFT Stamps - Scenic Safari
Inks: Simon Says Stamp - Intense Black,  Versafine - Onyx Black,  Distress Inks - Antique Linen, Gathered Twigs and Broken China Distress Oxide
Copic Markers: Skin - E11, E33, V15, R20  Hair - E25, E29  Hat, Chaps and Vest - E42, E43, E44  Shoes & Belt - E44, E47, E49  Jeans - B93, B97, B99  Shirt - G12, G24, G94  Handkerchief - R05, R24, R27  Cactus - YG03, YG21, YG25, R20, R05, R24, R27, E42, E43, E44
Other: Recollections - 110lb White card stock and 65lb Kraft card stock,  MFT Stamps - Mini Cloud Edges and Drifts & Hills stencils,  Sakura - White Gel Pen

Thank you o much for taking the time to drop by and I hope you have a wonderful day! Kathy

Friday 20 July 2018

Christmas Not So Mini, Mini Album

Hello my friends and welcome back.

I have been on a kick of making mini albums and have watched several YouTube videos to get ideas and instructions on putting an album together and creating different styles of pages.

This is my first time creating a mini album that has a chipboard cover and card stock pages with hinges inside.  I did have to rip out my first set of hinges but managed to salvage most of the album and ended up using the Hidden Hinge Plus system from Kathy Orta King.  Here is a link to her tutorial: Hidden Hinge Plus Tutorial

The finished size of this album is 9" x 7 1/2" with a 2 1/2" spine.  Each inside page measures 8 1/2" x 7".  I used the Craft Smith - Say Freeze 12 x 12 paper pad from Michaels and Recollections 65lb Cranberry card stock to create this album. I hope you like what I came up with.


I also wanted to share the YouTube channel for Lauras Craft Zone, she makes great mini albums and her tutorials are so clear and detailed.  

Below are more pictures of the actual pages for the mini album.  There are a total of six pages and each page has a large tag that has a tab to pull them out of the side pocket, which I created using the We R Memory Keepers' Envelope Punch Board.


Thank you so much for taking the time to drop by and I hope you give making a mini album a try.

I hope you have a wonderful day! Kathy

Sunday 8 July 2018

Coffin Shaped Mini Album With Matching Storage Box

Hello my friends and welcome.

Today I am sharing something other then a card.  This past week I decided I wanted to create a mini album to go into a paper-mache coffin shaped box I bought several years ago.  The box I used is the largest of three nesting coffin boxes and is 8" long, 4 1/2" wide and 2 1/2" deep.  With the help of the smaller box, I created a template and traced and cut some black medium weight chipboard into eight coffin shaped pages, 7 1/2" long and 3 3/4" wide.


The first thing I did was paint the box inside and out with some black acrylic paint, which I then put aside to work on the mini album pages.  I went through my Halloween themed paper and found The Apothecary Emporium Collection Kit from Echo Park, which included 12 x 12 double side design papers and a 12 x 12 Element Sticker sheet.  I covered each mini album page back and front with some design paper.


I then inked up all the edges with Black Soot Distress Ink and punched holes in the top of each page.

I put the pages aside and went back to the box, which I covered with some design paper, which was also inked with Black Soot and decorated the top of the box with one of the stickers from the kit and some flowers from I Am Roses.  The Large black flowers were already black and the other flowers that were creme, I coloured with Golden Lump of Coal and Hag's Wart Orange Starburst Sprays from Lindy Stamp Gang.


I also decided to create coffin shaped tags for each page out of 100lb black card stock and covered one side with more design paper.  I created little pockets at the bottom of each mini album page for the tags to slip in.  I used some scraps of design paper and a couple of dies from MFT Stamps to make some flags which I partially glued to the front or the back of some tags so that other tags or elements good be slipped under the flags.  I added an eyelet to each album page and attached them to together with a black binder ring from 7 Gypsies and decorated the ring with some tulle, seam binding and fibres in black and orange to go along with the paper.

Here are a bunch of photos of each page and tag of the album.


Here are a few more pictures showing the completed album and box.


I know I have probably overwhelmed you with pictures but I really appreciate you dropping by.

Have a wonderful day! Kathy